Vagrant - Creating our own Box File from ISO.
Install VirtualBox
I assume that you've already got the VirutalBox installed. Else its very simple, just have it installedInstall Vagrant
Then refer the previous post on Vagrant to have it installed.Creating a CentOS VM
Download the CentOS 6.5 x86_64 DVD.
Launch VirtualBox and do the following by click on the "New" on the left hand upper corner
This is like the hardware has been built,
Now installing the OS on this machine, before we do that we tell it, where to pick up the ISO file from and disable unnecessary stuff.
Now while our VM is highlighted click on the Start
And this will load the lovely centos onto our VM!
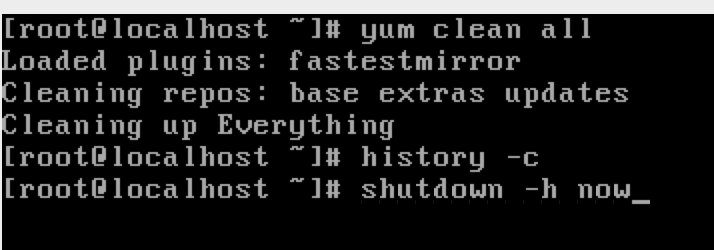
In case it reboots, just log in and shutdown the VM using "shutdown -h now" and making the VirtualBox image a little clean we do the following.
Configuring the VM to be in action when need!
Configuring the network on this device.
Now you should be able to get the interface listed in ifconfig and able to ping Google!
Configuring Time on this machine!
yum install ntp ntpdate ntp-docchkconfig ntpd on
service ntpd stop
ntpdate time.nist.gov
service ntpd start
Check if the ssh service is running on this server and ensure that it will be running after we restart
service --status-all | grep ssh
chkconfig sshd onRelaxing on Security!
Now something which you shouldn't be doing if this box will be used to create prods. We will disable the iptables and make SELinux premissive due to being lazy in dealing with network services.
chkconfig iptables off
vi /etc/selinux/config
and add
SELINUX=permissive
Let's add a user who will have access to this VM
useradd vagrantnow creating the .ssh folder for the vagrant user, the usual mkdir with -m to set the mode of the folder that is being created and -p the path.
mkdir -m 0700 -p /home/vagrant/.sshWe will use the ssh keys provided by vagrant
curl https://raw.github.com/mitchellh/vagrant/master/keys/vagrant.pub >> /home/vagrant/.ssh/authorized_keys
chmod 600 /home/vagrant/.ssh/authorized_keyswe make sure that the vagrant user owns the ssh folder
chown -R vagrant:vagrant /home/vagrant/.sshWe will need to allow ssh to be able to send remote commands without using sudo and hence will comment out requiretty in /etc/sudoers.
you can do it simply by typing visudo and this will open the file and search for the word by typing /requiretty and comment out the line once found
And added the line
vagrant ALL=NOPASSWD: ALL
Now when we reboot the system the network interface flys away and to avoid that from happening, we change the ONBOOT to yes
We will remove the udev persistence as we will be using this box else where
rm -f /etc/udev/rules.d/70-persistent-net.rules
yum install -y git vim man wget openssh-clients
now that are VM is all to be on Air! we will clean up the yum and history
yum clean all
history -c
shutdown -h now
Now what we have is these files, these files can themselves be distributed or kept for future use with VirtualBox, but the reason we need a box file is so that Vagrant can do it automatically and create several VMs in a matter of few minutes!
Creating the Box out this now!
Create a directory I've created one called vagrant_test in the home directory.
And we use the command
vagrant package --base centos-6.5x86_64-minimal --output centos-6.5x86_64-minimal.box
vagrant package --base <name of the Vitual box image> --output < filename of your choise>
<name of the Vitual box image> is the name we gave while creating the Virtual box image.
This is the output we get and there is sometime delay for the new VM to get created.
Out brand new baby is now available to spin any number of VM now.
Taking the box file for a test ride now!
To do that let us tell Vagrant that now it has box which it can use.
We've finally done this, and I am going to be sharing this box with you all on a link.


